by Basant Apr 30, 2024 | PHP
Steps:
AWS
putty
sudo su
apt update
apt install apache2
service apache2 start
service apache2 status
you will see a ubuntu on your ip
(/var/www/html/index.html)
cd /var/www/html/
ls
now you see index.html
now remove this index.html file
rm index.html
ls
install PHP apt install php
install mysql sever apt install mysql-server
now open filezilla
use ssh
password ppk key
upload file (in my case index2.zip) inside ubuntu folder
now move uploaded zip file into /var/www/html/
mv index2.zip /var/www/html/
cd /var/www/html/
ls
now install unzip
apt install unzip
now unzip your file
unzip index2.zip
now
ls
now open
add your directory name if you have then save
now open mysql
mysql h localhost -u root
now change your db password using below query
ALTER USER ‘root’@localhost’ IDENTIFIED BY ‘BasantMallick’;
here BasantMallick is your password
now login with new password in mysql
now
use frmscui;
for importing sql file use below command
first exit from mysql
second move into parent or index file directory
and use below command
mysql -h localhost -u root -p yourdatabase > sqlfilename.sql
then again login into database
after login
use databasename
show tables
Note: for editing in file use nano before filename
Method 2:
Aws Cloud – host php mysql website on aws ec2 in hindi | http to https aws | free ssl
— * Used Commands *–
update apt install mysql mysql secure installation install apache install php restart apache install phpmyadmin fix if php myadmin not work enable file permission change phpmyadmin password Note: https://help.ubuntu.com/community/FilePermissions
ubuntu@ip-172-31-13-220:~$ sudo chown -R www-data:www-data Netrika/
ubuntu@ip-172-31-13-220:~$ ls -ilah
by Basant Feb 2, 2024 | PHP , WORDPRESS
Certainly! If you want to convert a multi-column form layout to a single column when viewed on mobile, follow these steps using WPForms:
Creating a Multi-Column Form Layout :Start by creating a form with multiple columns. For example, let’s create a two-column layout using the CSS class wpforms-one-half. The first field in each row should also use the wpforms-first class to indicate that it starts a new row. Displaying Fields in a Single Column on Mobile :In the form builder, click on a field to display the Field Options. Under the Advanced section, add the wpforms-mobile-full class to the CSS Classes field. Repeat this for other fields in the form. Don’t forget to click the Save button to keep the changes. Now, when mobile visitors access your form, the multi-column layout will be shown as a single column. Your forms will look professional and user-friendly on smaller screens! 📱
by Basant Oct 24, 2023 | PHP , WORDPRESS , Wordpress Design
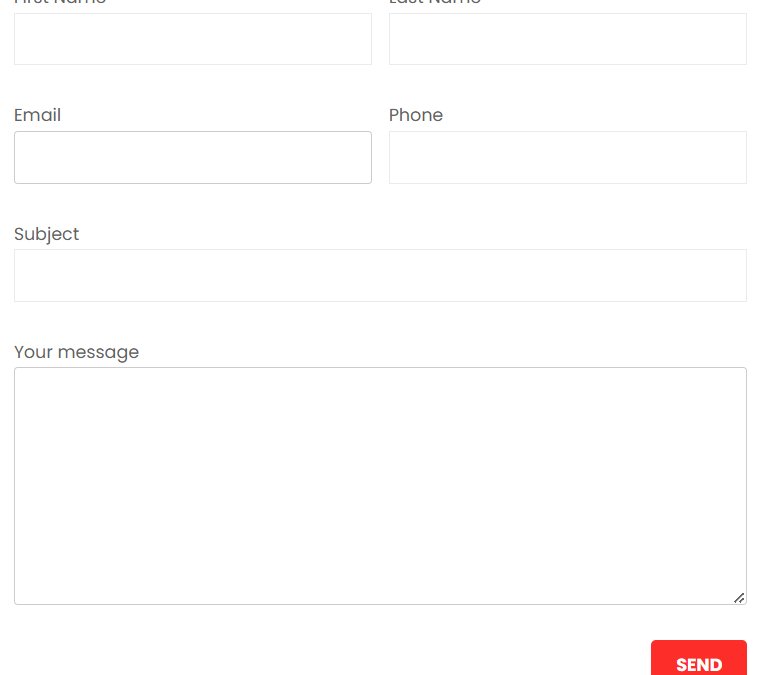
I’ve wrote about creating a two column form in Contact form 7. Now in this tutorial we will see on how to produce a responsive two column form . The form will be in two columns in bigger screens and will come one column in mobile devices . Our final form will look like the following .
you just follow below simple steps:
Step 1: create contact form and copy and paste below code.
and modified field according to your need.
<div id=”responsive-form” class=”clearfix”>
<div class=”form-row”>
<div class=”form-row”>
<div class=”form-row”>
<div class=”form-row”>
<div class=”form-row”>
</div>
Step 2: copy below css and paste in your customiser
/* contact form7 style */
wpcf7 input[type=”text”], .wpcf7 input[type=”email”], .wpcf7 textarea {
width: 100%;
padding: 8px;
border: 1px solid #ccc;
border-radius: 3px;
-webkit-box-sizing: border-box;
-moz-box-sizing: border-box;
box-sizing: border-box
}
.wpcf7 input[type=”text”]:focus{
background: #fff;
}
.wpcf7-submit{
float: right;
background: #CA0002;
color: #fff;
text-transform: uppercase;
border: none;
padding: 8px 20px;
cursor: pointer;
}
.wpcf7-submit:hover{
background: #ff0000;
}
span.wpcf7-not-valid-tip{
text-shadow: none;
font-size: 12px;
color: #fff;
background: #ff0000;
padding: 5px;
}
div.wpcf7-validation-errors {
text-shadow: none;
border: transparent;
background: #f9cd00;
padding: 5px;
color: #9C6533;
text-align: center;
margin: 0;
font-size: 12px;
}
div.wpcf7-mail-sent-ok{
text-align: center;
text-shadow: none;
padding: 5px;
font-size: 12px;
background: #59a80f;
border-color: #59a80f;
color: #fff;
margin: 0;
}
#responsive-form{
max-width:600px /*– change this to get your desired form width –*/;
margin:0 auto;
width:100%;
}
.form-row{
width: 100%;
}
.column-half, .column-full{
float: left;
position: relative;
padding: 0.65rem;
width:100%;
-webkit-box-sizing: border-box;
-moz-box-sizing: border-box;
box-sizing: border-box
}
.clearfix:after {
content: “”;
display: table;
clear: both;
}
/**—————- Media query —————-**/
@media only screen and (min-width: 48em) {
.column-half{
width: 50%;
}
}
/* end contact form7 style */
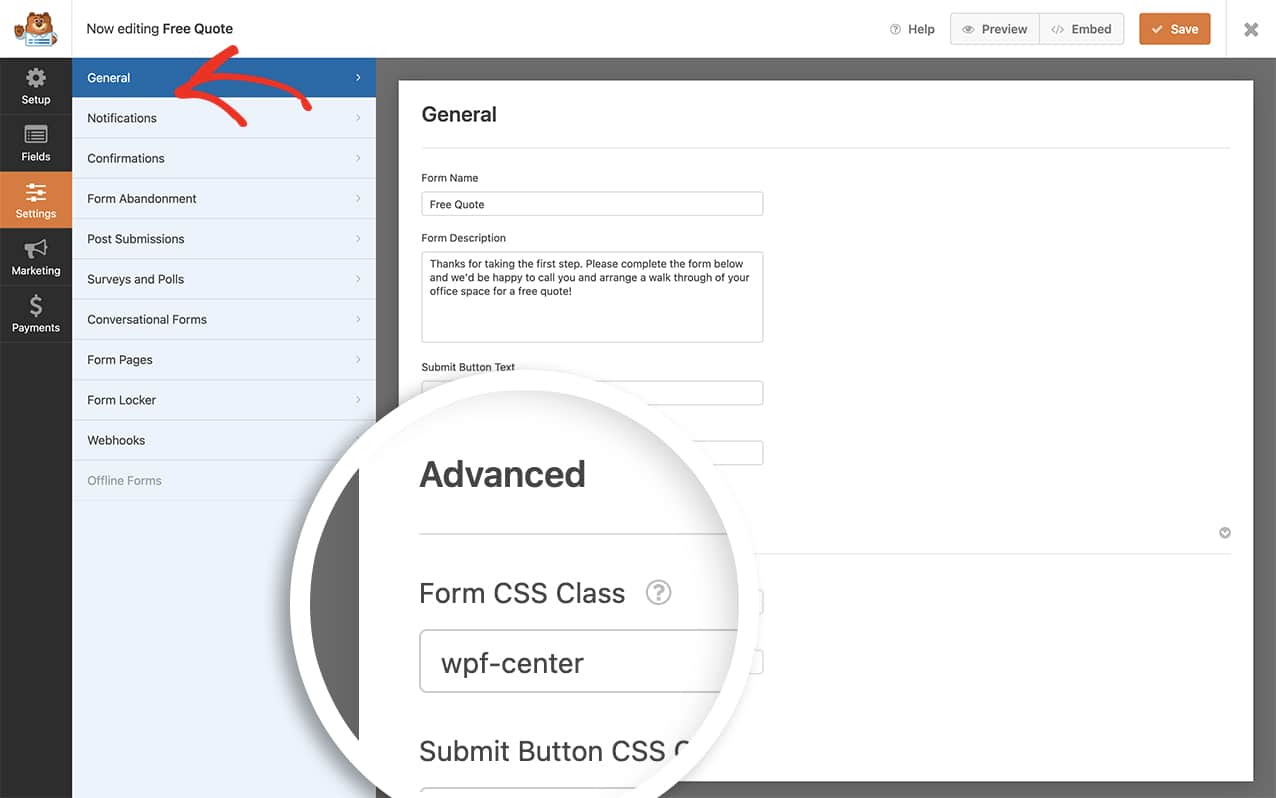
by Basant Sep 11, 2023 | PHP , WORDPRESS
You must navigate to Settings » General first. Add wpf-center to the Form CSS Class box.
Now, Navigate to Appearance >>> customize >>> Advance CSS
And finally, we now just need to add the CSS to our site that will center a form.
add below mentioned code as it is.
.wpf-center .wpforms-submit-container {
display: inline-block;
text-align: center;
width: 100% !important;
}Booom.
by Basant Sep 2, 2023 | PHP , WORDPRESS , Wordpress Design
if you want to add marquee on any website (wordpress,PHP,HTML,Blogger). you just need to follow below step
Steps:1 Copy below code <section style="margin-bottom: -13px;"><marquee onmouseover="this.stop();"
onmouseout="this.start();">
<span style="color:white;">
<a style="color:white;" href="/netrikas-coffee-table-book-edition-ll/"><strong>New:</strong> Netrika's Coffee Table Book Edition – ll</a>
|
<a style="color:white;" href="/cyber-security-preparedness-survey-edition-ll/"><strong>New:</strong> Cyber Security Preparedness Survey: Edition ll</a>
|
<a style="color:white;" href="/covid-compendium-edition-x/"><strong>New:</strong> Compendium Edition X</a>
| <a style="color:white;" href="/covid-compendium-edition-ix/">Compendium Edition IX</a>
| <a style="color:white;" href="/combating-the-battle-against-counterfeit-medicines-a-newsletter/"> Combating The Battle Against Counterfeit Medicines VII - A Newsletter</a> | <a style="color:white;" href="/anti-bribery-and-corruption-a-newsletter/">Anti- Bribery And Corruption - A Newsletter</a></span>
</marquee>
</section>
Step 2: modify code according to your need.
Step 3: That’s it. Note: in this code marquee text will automatically stop, when mouse hover on It.
by Basant Apr 1, 2023 | PHP , WORDPRESS
First Method:
Use below code to play youtube video in loop and most important is please change youtube embed link
<iframe width="560" height="315" src="https://www.youtube.com/embed/AX_bpLLQOWI?autoplay=1&loop=1" title="YouTube video player" frameborder="0" allow="accelerometer; autoplay; clipboard-write; encrypted-media; gyroscope; picture-in-picture; web-share" allowfullscreen></iframe>Method 2:
This method also make responsive of your video (in mobile and desktop too)
<style type="text/css">
.full-width-youtube-video {position: relative; padding-bottom: 56.25%; height: 0;}
.full-width-youtube-video iframe {position: absolute; top: 0; left: 0; width: 100%; height: 100%;}

@media only screen and (max-width: 600px) {
  .full-width-youtube-video {padding-bottom: 100%;}
}

</style>
<div class="full-width-youtube-video">
	<iframe width="560" height="315" src="https://www.youtube.com/embed/AX_bpLLQOWI?autoplay=1&rel=0&loop=1" title="YouTube video player" frameborder="0" allow="accelerometer; autoplay; clipboard-write; encrypted-media; gyroscope; picture-in-picture; web-share" allowfullscreen></iframe>
</div>