Google OAuth API provides a simple and powerful thanks to integrate the login system on the web site.
Google Login API permits the user to sign into web site|the web site} using their Google account while notsign on thereon website.
Google login system positively helps to extend the subscribers on your web site. as a result ofthese daysmost users have a Google account and that theywill log in with their Google account while not registration on your web site.
If You Want to Login with google Account then Just Follow below Step:
a. make your project name and click on create button wait for sec. select your project if you have multiple project then enable api
4. then you see below image like webpage
5. click on library then search google+api
6.click on them and then enable it
7. create credentials
8. choose a. google+ Api b. web browser c. click on user data and click on what credentials button
9. after click you saw a popup now click on set up consent screen then you will redirect to below image webpage
10. Type application name which you want and add Authorised domain name and just save them
11. create credentials
12. click on OAuth client ID and choose web Application
13. just see below image and follow them carefully
14. click on create button 15. after create you will see a popup where you see client Id And Client secret
16. click on credentials like below image
17. click on name (web client1 in my case) 18. download json file
19. put downloaded json file inside your google folder where you see client_credentials.json file replace all code of these file with your downloaded json code.
Add Paytm Payment Gateway to your mobile app or website. Collect online payments from your customers using UPI, Debit/Credit Cards, 50+ NetBanking options and Paytm Wallet.
PaytmIS A PAYMENT PROCESS SYSTEM, I WILL INTEGRATE Paytm WITH WEBSITES BY USING WITH PHP
Just follow below steps:
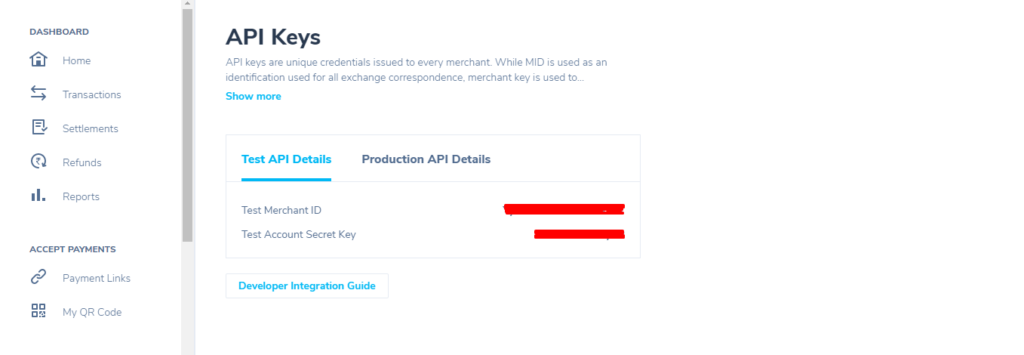
Step1: First, we need to create an account at https://business.paytm.com/ and get our merchant ID and Secret Key.
Now we can start coding in our site to use the Paytm. First, we will configure the Paytm with test credentials to test our code.
Step 2. (filename – config.php)
<?php /*
– Use PAYTM_ENVIRONMENT as ‘PROD’ if you wanted to do transaction in production environment else ‘TEST’ for doing transaction in testing environment. – Change the value of PAYTM_MERCHANT_KEY constant with details received from Paytm. – Change the value of PAYTM_MERCHANT_MID constant with details received from Paytm. – Change the value of PAYTM_MERCHANT_WEBSITE constant with details received from Paytm. – Above details will be different for testing and production environment.
*/ define(‘PAYTM_ENVIRONMENT’, ‘TEST’); // PROD define(‘PAYTM_MERCHANT_KEY’, ‘**********’); //Change this constant’s value with Merchant key downloaded from portal define(‘PAYTM_MERCHANT_MID’, ‘**********’); //Change this constant’s value with MID (Merchant ID) received from Paytm define(‘PAYTM_MERCHANT_WEBSITE’, ‘**********’); //Change this constant’s value with Website name received from Paytm
Step 4. Here in form, we have set the action=”Redirect.php”, so we will create a new file with this name –
<?php header(“Pragma: no-cache”); header(“Cache-Control: no-cache”); header(“Expires: 0”); // following files need to be included require_once(“./lib/config_paytm.php”); require_once(“./lib/encdec_paytm.php”);
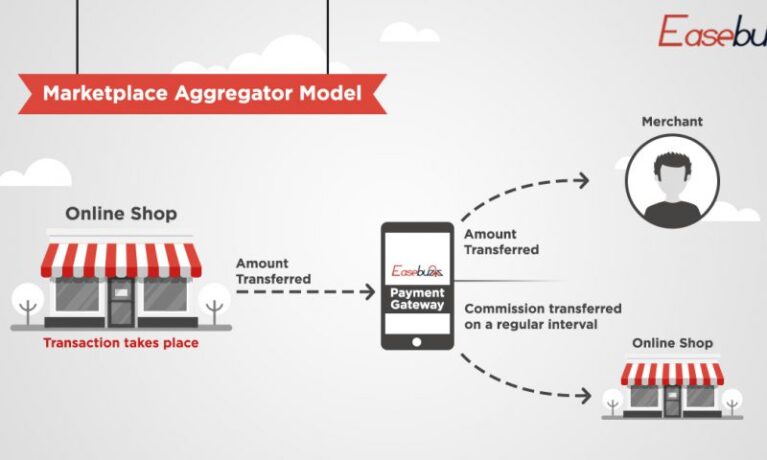
SafexPay is the brand from PayGate having multiple payment solutions like white label payment gateways for banks and institutions and provides an all-inclusive payment gateway solution to merchants. SafexPay also provides Prepaid wallet platform , UPI solution, Recharge Solution, Offline Payments Like email, SMS and QR code based payments. Some of our unique product offerings are advanced Integration API for best success ratios, Dynamic Currency Conversion (DCC), Push Response Technology, Dynamic Switching, Retry options, Advanced Analytics, Recurring Payments, Multiple Currency Options, Omni-Channel Offering, E-Wallet & M-commerce etc. SafexPay aims to build digital payments businesses and platforms- Encompassing payment gateways, payment aggregation (through a PSP setup), mobile wallets , White-Label Solutions as well as to provide value added services in the payments domain to consumers, merchants, banks and financial institutions across the globe.
SAFEXPAYis a payment process system, I will integrate SAFEXPAY with websites by using with php
PayPal is a payment process system, we will integrate PayPal with websites by using with php.
PayPal integration classification system PayPal integration classification systemincludedfour files as shown below.
constants.php − This file has included API user name, password and signature.
CallerService.php − This file has included PayPal Services, thatis employed to decision PayPal services.
confirmation.php − This file has included a form with minimum fields requiredto make payment process and it’llcome back payment success or failure.
PayPal_entry.php − This page has used to send the user the info to PayPal. It acts as associate adapter between PayPal and user form.
The user has totransfer a PayPal SDK file from here and precisea zipper file. The zip file contains four php files, we do nothave to be compelled toamendment any file except constants.php
The constants.php file contains code as shown below −
<?php
define('API_USERNAME','YOUR USER NAME HERE');
define('API_PASSWORD','YOUR PASSWORD HERE');
define('API_SIGNATURE','YOUR API SIGNATURE HERE');
define('API_ENDPOINT','https://api-3t.paypal.com/nvp');
define('USE_PROXY',FALSE);
define('PROXY_HOST','127.0.0.1');
define('PROXY_PORT','808');
define('PAYPAL_URL','https://www.PayPal.com/webscr&cmd=_express-checkout&token=');
define('VERSION','53.0');?>
The user can declare User Name, password and signature in on top of syntax thatarea unit placed in constants.php. this can beAN experimental example therefore the last quantityaresupplementary to sandbox’s account.
I am an experienced PHP web developer and completed several web development projects successfully using Html5, CSS3, Bootstrap, Tailwind CSS, JavaScript, jQuery, React JS, PHP, Laravel, Cakephp, WordPress, Woocommerce, Postgres SQL and Mysqli. I am a Part time freelancer and working for a Reputed Company and work with an employer.


 7. create credentials